Create Landing Pages in Rezfusion Web
- Tom Kenyon (Deactivated)
- Andre Aguiar (Deactivated)
- Kelsey McCormick (Unlicensed)
- Hunter Hithe (Unlicensed)
This guide is designed to help Rezfusion Web users create pages that will help strengthen SEO performance.
What is a Landing Page?
A Landing Page is a page on your website that has a photo and text up top, and properties feeding below. Each Landing Page has two parts. The top header which includes a photo, headline, subhead and intro copy. Below that, the second part includes a call-to-action button and properties from your property management software.
You can see the two sections in our example below:
Choosing a Property Amenity for Landing Pages in Rezfusion Web.
Select an amenity field:
Be sure to log in to Rezfusion Cloud. Every property amenity from your Property Management Software is available for use in Rezfusion Cloud to build a Landing Page from.
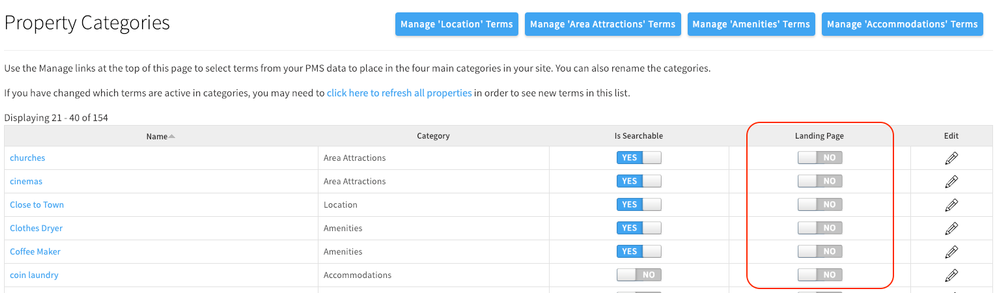
- Select Property Categories in the Dashboard.
- Check to see if the amenity you want is already available on the list.
- If so, toggle on Landing Page, to the right of Make Searchable. You are done with step 1.
- If not, click on a category in the top menu that is most appropriate. (e.g. Area, Location, Amenity, Type)
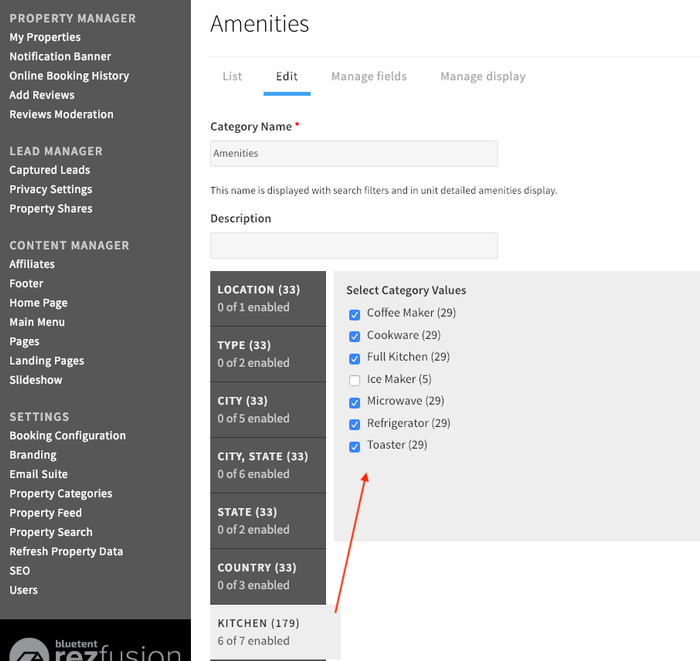
- Within the category, browse all the amenities available from your PMS (See graphic below)
- Select the amenity you want (e.g. Pet Friendly). Tip: Be sure to confirm the number to the right of the amenity is the number of properties in your inventory with that amenity.
- Select Save at the bottom of the screen and you will be returned to the Property Category page.
- You will NOT see your amenity listed until you refresh property data. Select Refresh Property Data in the Dashboard, and click the Refresh button.
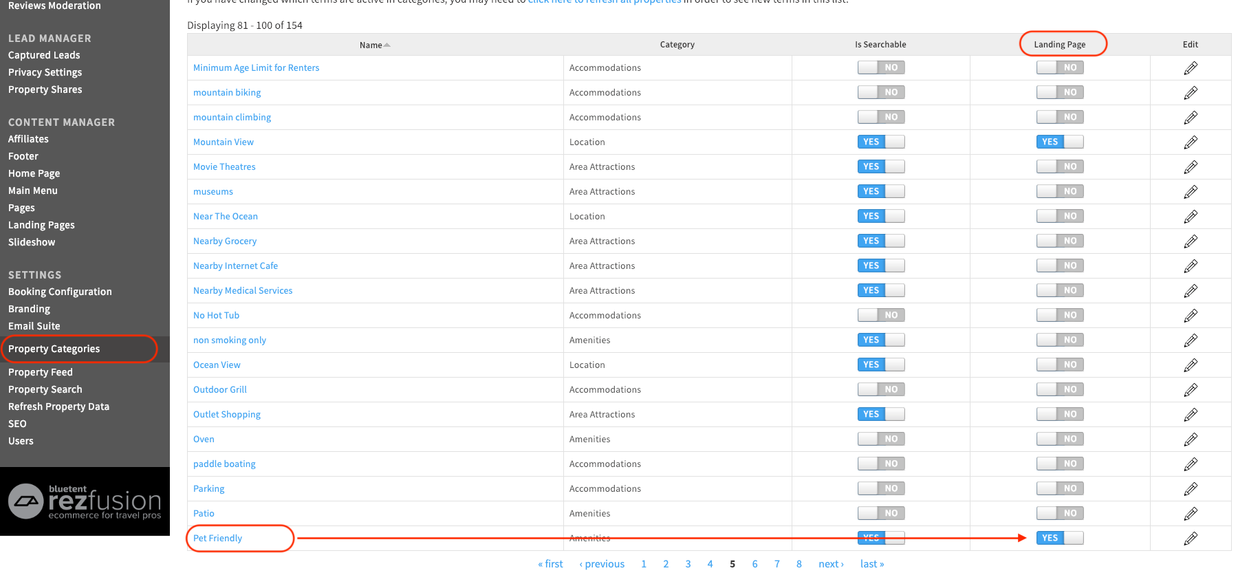
- Return to Property Categories in the Dashboard, and you will now see your amenity. Toggle on the Landing Page. Be sure to toggle off Make Searchable if you don't want your amenity in your main search filters.
In the screen shot below, Pet Friendly is already available in the list and we can toggle on the Landing Page.
If your amenity is not available on the list, you will need to select the appropriate category button up top. and browse for your amenity. If we click the Featured Amenities button up top, we can browse for our amenity.

Once you have selected your amenity, don't forget to scroll to the bottom and save. You will then need to refresh all property data.

Once you have refreshed your properties, you can then return to the Property Categories, and toggle on Landing Page.
Editing Landing Pages in Rezfusion Web
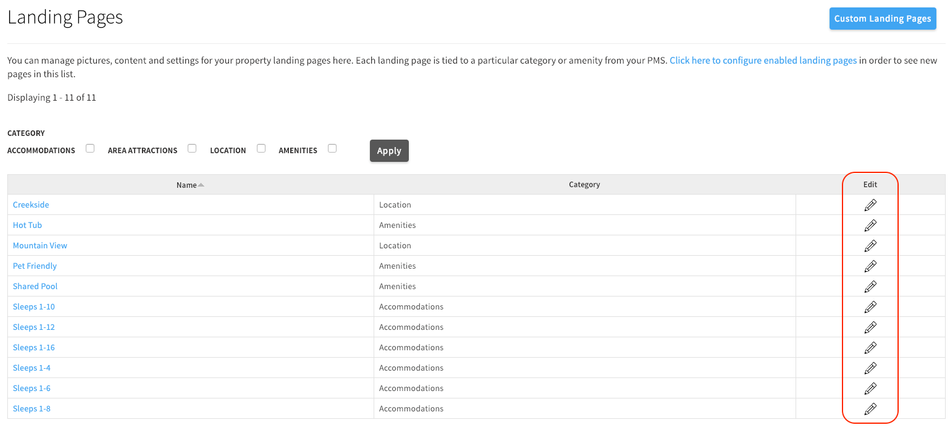
- In the Dashboard, select Landing Pages within the Content Manager section.
- Click the pencil icon next to the landing page you want to edit.
Note: You will not be able to see the properties that will feed into this page in the edit screen, Those will appear on the live page only. 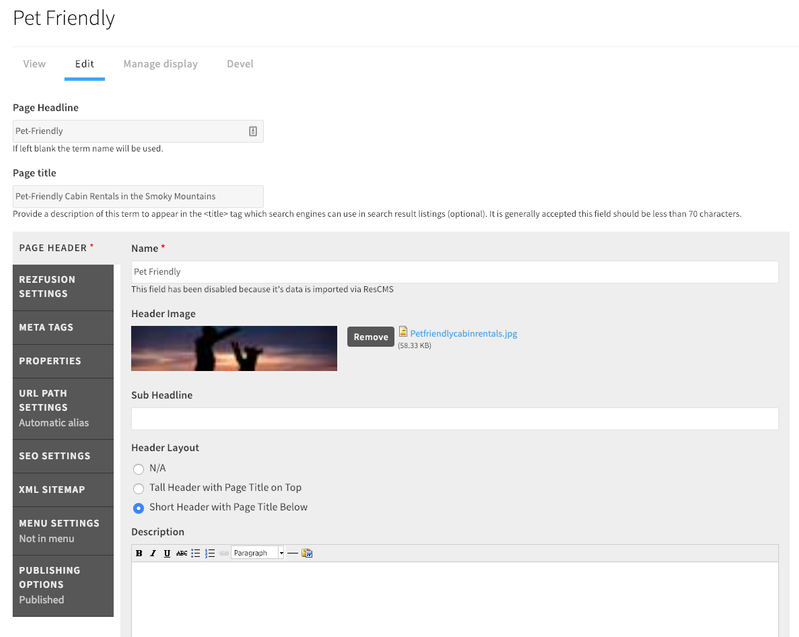
Step 1. Making Great Page Titles.
- You will see the Name field is populated with your amenity name, (e.g. Pet Friendly). We want to make this more descriptive for guests.
- Above Name field, is Page Headline. Enter in a more descriptive page title here, (e.g. Pet-Friendly Vacation Rentals). If you leave this field blank, the Landing Page will use the name of the amenity.
Step 2. Creating your page copy.
- In the Sub Headline field, enter your page's sub head, (e.g. Perfect Properties for Four-legged Travelers)
- The next field, Header Image, is covered in Step 3.
- After header image, enter your page copy in the Intro Copy section. This is the only place you can enter page copy.
Step 3. Header Image Size
Landing Pages in Rezfusion Cloud allows you to upload a photo for the page header.
- In the Header Image section near the top of the page, select if you would like a tall header image, short, or none.
- Select upload header image and be sure to click the upload button.
Header Image Photo Sizes
- Tall Header Image Size Suggestion: 1800 pixels wide by 600 pixels tall.
- Short Header Image Size Suggestion: 1800 pixels wide by 400 pixels tall.
Step 4. Add to Menu
Now that your Landing Page content is complete, it is time to add to your main menu.
- When editing the Landing Page, look for the vertical tab Menu Settings
- Select Provide a Menu Link
- Change the Menu Link Title if you would like in the field provided.
- Scroll to the bottom of the page and click Save. We will position the link in later steps.
- In the Dashboard, select Main Menu in the Content Editor section.
- You will see your new Landing Page link in the list. Drag it to the location you would like and click Save.
- You're done. Visit your website and navigate to your new Landing Page.